Omnify: 7 Common Light Panel Mistakes (And How to Fix Them)
April 2, 2026
LED Light Guide Panel Problems: Omnify Insights on the 7 Most Common Mistakes
You’ve invested in premium LED light guide panels for your retail display or commercial project. The specs looked perfect. The samples were gorgeous. But now? Something’s off. Maybe the lighting is uneven, or panels are starting to fail way before they should.
Here’s the thing, most LED light guide panel problems aren’t manufacturing defects. They’re installation and specification mistakes that happen before the panel ever lights up. After 20 years in the backlighting industry, Omnify has seen these errors countless times. The good news? Every single one is fixable. Let’s walk through the seven most common mistakes and, more importantly, how to avoid them.
Mistake #1: Mismatching Voltage & Current
This one’s sneaky because it doesn’t cause immediate failure. Your LED light guide panel might work fine for weeks or even months. But behind the scenes, you’re slowly cooking your investment. When voltage doesn’t match your panel’s requirements: whether it’s running too high or too low: you create hidden strain on LED chips and solder connections. The degradation is gradual. Brightness fades. Color temperature shifts. Eventually, sections start dying.
The Fix: Always verify the voltage requirements before connecting anything. Most LED light panel sheets operate at either 12V or 24V, but don’t assume. Check the manufacturer’s label on every panel and match your driver accordingly. It takes thirty seconds and saves thousands in replacement costs.
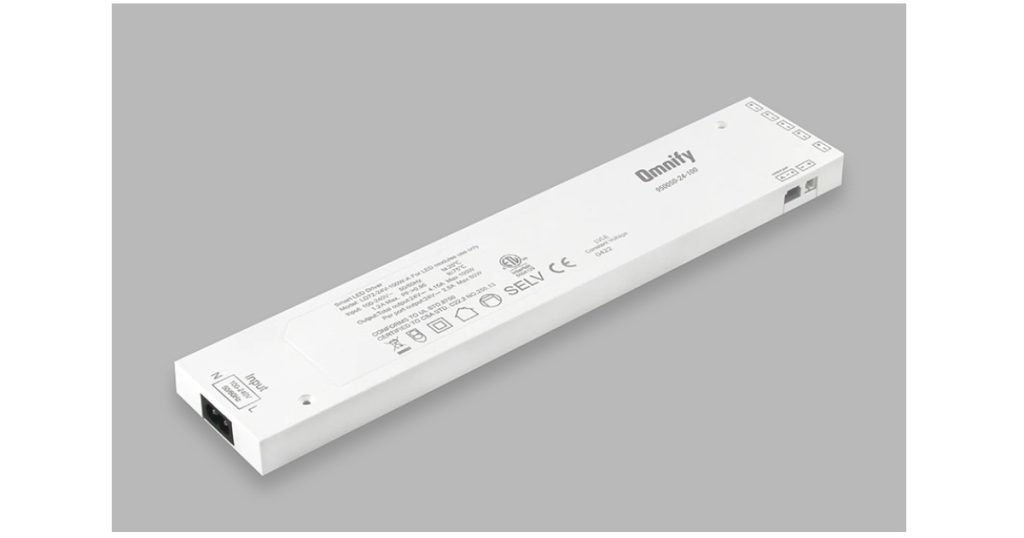
Mistake #2: Ignoring Power Load Calculations
Here’s a scenario Omnify sees constantly: A designer specs out a beautiful backlit wall featuring multiple light guide panels linked together. They grab a driver that can technically handle the total wattage. Installation day comes, everything lights up beautifully: and three months later, the client calls complaining about flickering. What happened? The driver was running at maximum capacity with zero buffer. During extended operation, heat builds up, the driver struggles, and performance tanks.
The Fix: Calculate your total wattage, then add a 20% safety buffer when selecting your driver. If your panels pull 80 watts total, spec a 100-watt driver minimum. This keeps everything running cool and stable, even during those 12-hour retail days.
Mistake #3: Installing on Uneven or Dirty Surfaces
LED light guide panels need to lie flat. Completely flat. When they’re mounted on bumpy, warped, or dirty surfaces, several problems emerge simultaneously.
First, sections lift or warp, creating visible hot spots and dark patches in your lighting. Second: and this is the bigger issue: heat can’t transfer properly. Light guide panels rely on consistent contact with their mounting surface to dissipate heat. Gaps create thermal pockets that accelerate LED degradation. This becomes especially problematic on decorative surfaces like textured walls, stone countertops, or curved shelving displays.
The Fix: Clean and completely dry your mounting surface before installation. For surfaces that aren’t perfectly flat, consider flexible LED sheets designed to handle controlled bending. At Omnify, their engineering team regularly helps clients spec the right panel flexibility for challenging installations: it’s one of those details that makes or breaks a project.
Mistake #4: Using Inadequate Adhesives & Fasteners
Standard double-sided tape seems like an easy solution. It’s cheap, it’s fast, and it works: until it doesn’t. Heat cycles, humidity changes, and simple gravity take their toll. Within months, panels start lifting at the corners. Vertical installations sag. Outdoor or semi-outdoor applications fail even faster. That beautiful backlit menu board you installed? Now it’s got visible tape lines and crooked panels.
The Fix: Invest in adhesives and mounting hardware specifically designed for LED panel applications. For vertical installations or areas with temperature fluctuation, mounting clips or aluminum channels provide mechanical security that tape simply can’t match. This is another area where proper lighting design pays dividends: thinking through mounting solutions during the planning phase prevents expensive retrofits later.
Mistake #5: Failing to Manage Heat & Ventilation
LEDs are efficient, but they still generate heat. Without adequate thermal management, that heat pools beneath your panels, slowly destroying LED chips from within. Omnify sees this constantly in retail lightboxes, hotel lobby features, and point-of-purchase displays: anywhere panels run continuously for hours. The installation looks perfect initially. Six months later, you’re dealing with premature burnout and visible degradation. Poor-quality plastic heat sinks make this worse. They simply don’t dissipate heat effectively, turning your expensive LED light guide panel into a short-term solution.
The Fix: Incorporate aluminum backing sheets or channels into your design. Metal heat sinks dramatically outperform plastic alternatives, maintaining safe operating temperatures even during extended runtime. For enclosed applications like lightboxes, ensure there’s adequate ventilation: even small air gaps help.
Mistake #6: Cutting Outside Designated Zones
LED light panel sheets are designed to be cut to size: but only in specific locations. Those little scissor icons or dotted lines aren’t suggestions. They mark the safe cutting points where circuits can be separated without damage. Cut outside those zones and you’ll snap circuits, expose conductive lines, or create shorts.
The result? Dead sections, flickering, or complete panel failure. And unlike other mistakes on this list, there’s no fixing a bad cut. That panel is done. Cheaper panels without clear cutting markers make this problem worse. You’re essentially guessing where to cut and guessing wrong is expensive.
The Fix: Only cut along manufacturer-designated sections. If markers aren’t clearly visible, consult the installation guide before making any cuts. Better yet, work with suppliers who provide clearly marked panels and detailed cutting documentation. It’s a small detail that signals overall quality.
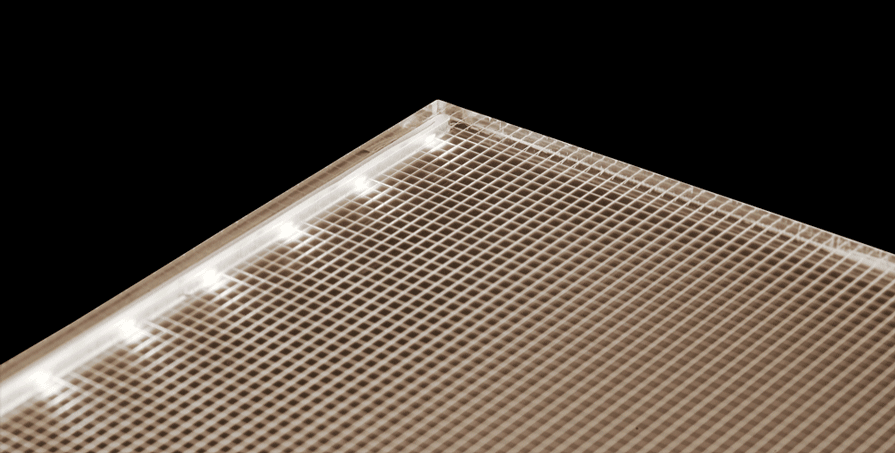
Mistake #7: Choosing Poor-Quality Light Guide Plates & Diffusers
This mistake happens before installation even begins: during the specification phase. Low-quality light guide plates alter how light travels through the panel, creating uneven distribution from day one. Cheap acrylic or PMMA diffusers compound the problem. They distribute light unevenly, and over time, they yellow at the edges. That crisp, bright display you installed gradually turns dingy and unprofessional.
The Fix: Specify panels with properly fitted light guide plates and high-quality polycarbonate diffusers rather than cheaper acrylic alternatives. The upfront cost difference is minimal compared to the performance and longevity gains.
This is exactly why understanding backlighting panel options matters so much during the specification phase. The decisions you make before ordering determine results for years to come.
Getting It Right from the Start
Here’s what these seven mistakes have in common: they’re all preventable with proper planning and quality components.
At Omnify, they have spent two decades refining their approach to LED backlighting solutions. Their three UL-certified global facilities mean quick turnaround times without sacrificing quality standards. And their local engineering support helps clients avoid these exact mistakes before they happen: whether that’s calculating power loads, specifying the right adhesives, or selecting panels with proper thermal management built in.
Because the best fix for LED light guide panel problems? Not having them in the first place.
Ready to spec your next project with confidence? Reach out to Omnify’s team they are happy to help you get the details right.
For more information on Omnify solutions HERE


LED Light Guide LED Light Guide LED Light Guide LED Light Guide LED Light Guide